You are required to write one weekly blog post of approximately 500 words. These blog posts will have a suggested topic that relates to each week’s readings and activities, or you may write about whatever you want (related to the program, of course!). Blog posts will be generally be due by the end of the week for which they are assigned, specific due dates are listed in the schedule.
Blog posts are not scholarly writing. You do not need to use citations unless you directly quote something or if it is unclear that you are using someone else’s work. Whenever possible, include links to other sites that you are referring to. You can be creative and include screenshots, videos, and other media in your posts. The goal of these posts is to reflect on the week’s theme.
If you wish to blog more than once a week, that is fine. Some ideas for entries could be: talking about a new tool we’ve used or that you’ve discovered; status updates on your projects; or anything else related to digital scholarship.
When publishing your blog posts, please use the category for the appropriate week so they are kept together.
WordPress Instructions
Logging in to WordPress
To create a post, first log in to blogs.bucknell.edu using your Bucknell username and password. Click on “Visit Dashboard” for the DSSRF 2024 site (Digital Scholarship Summer Research Fellows 2024)
Creating a New Post
When you log in to the course site, you will see a dashboard that looks similar to this:
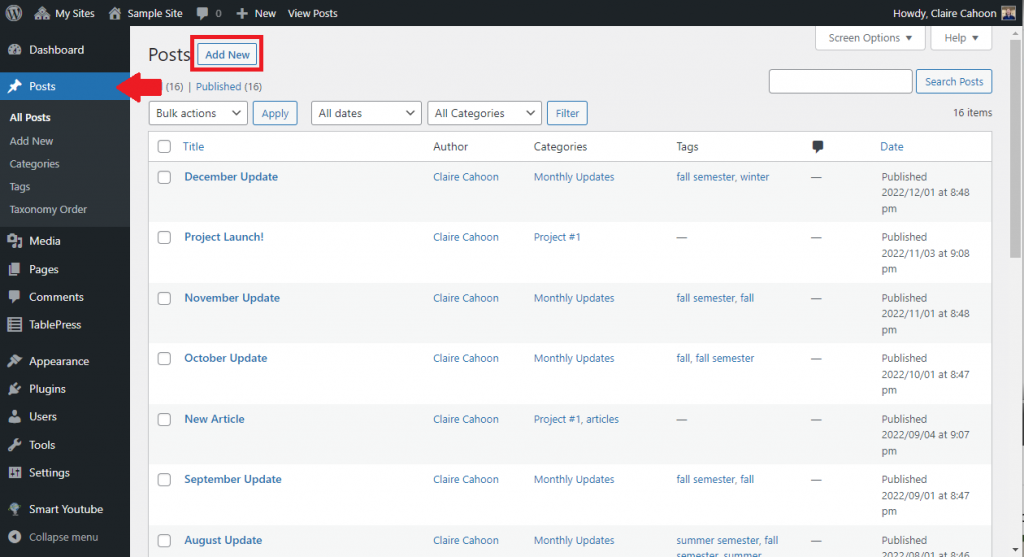
From this dashboard:
- Click on the “Posts” tab in the menu on the left.
- Click on “Add New” at the top of the screen to create a new post, or click on the title of an existing blog post to edit an existing one.
If you need help with editing your post, we suggest referencing the LinkedIn Learning video WordPress 5 Essential Training: Create Content (Posts).
Adding a Category
You will need to add a category to each of your posts so that they show up on the correct assignment page. There are two places you can add a category:
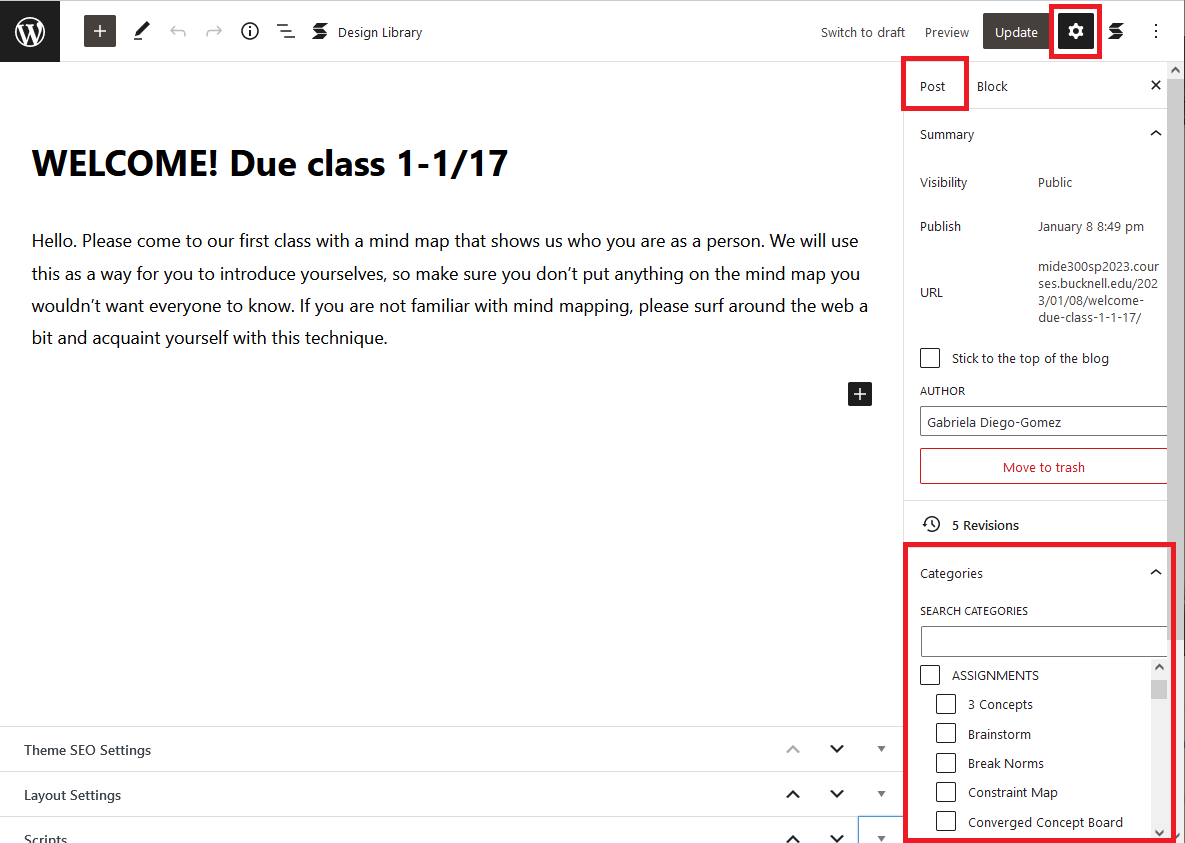
From the Editing Page
- While you have the post open to edit it, open the Settings menu (click on the gear icon in the top right of the page).
- In the “Post” tab, click on the section for “Categories.”
- Note: Sometimes it takes a minute or two for all of the sections to load.
- Then, you can scroll through the list and check the boxes next to the categories you want to add.
From the Posts Dashboard
- While you’re in the “Posts” section of the dashboard, hover over your post.
- Click on “Quick Edit” that appears under the title you’re hovering over.
- Once you have selected “Quick Edit,” you should see a Quick Edit menu with a sectino for “Categories” in the middle.
- In that section, check the boxes for the categories you want to add.